

Bitrate is one of the most critical factors that determine the quality of your Twitch stream. It affects how smooth and clear your video appears to viewers, making it essential to get your settings right. If your stream lags, buffers, or looks pixelated, the issue might be related to incorrect bitrate settings. In this guide, we’ll explain what bitrate is, common issues, and step-by-step solutions to fix your bitrate for optimal Twitch streaming.
What Is Bitrate and Why Is It Important for Twitch?
Bitrate refers to the amount of data your stream uploads to Twitch servers per second. It’s measured in kilobits per second (kbps) and plays a significant role in determining video and audio quality.
A higher bitrate results in better video quality, especially for higher resolutions like 1080p. However, it also requires a faster and more stable internet connection. Setting the right bitrate ensures a balance between quality and stream stability, reducing the risk of lag or buffering for your viewers.
Recommended Bitrate Settings for Twitch
Choosing the correct bitrate depends on your internet upload speed and the resolution at which you want to stream. Here are Twitch’s recommended settings:
- 720p at 30 FPS: 2500-4000 kbps
- 720p at 60 FPS: 3500-5000 kbps
- 1080p at 30 FPS: 3500-5000 kbps
- 1080p at 60 FPS: 4500-6000 kbps
Ensure that your upload speed is at least 1.5x higher than the bitrate you choose. For example, a 4500 kbps bitrate requires a minimum upload speed of around 7 Mbps to ensure a stable connection.
Common Bitrate Issues in Twitch Streaming
If your stream is experiencing problems, here are some common symptoms and their potential causes:
- Lag or Buffering: Your internet upload speed might be too low for the selected bitrate.
- Pixelation: The bitrate is too low for the chosen resolution, resulting in poor video quality.
- Frequent Disconnects: An unstable connection or network congestion can cause bitrate drops.
These issues often stem from incorrect settings, poor internet speed, or hardware limitations.
How to Test and Monitor Your Bitrate
Before making any changes, it’s important to test your internet upload speed and monitor your stream’s health. Here’s how you can do it:
- Check Upload Speed: Use tools like Speedtest.net to measure your internet upload speed. Ensure it meets the requirements for your chosen bitrate.
- Monitor Stream Health with Twitch Inspector:
- Visit Twitch Inspector and log in with your Twitch account.
- Use it to analyze your stream’s performance and identify bitrate-related issues.
- Real-Time Monitoring in OBS/Streamlabs:
- Streaming software like OBS or Streamlabs provides real-time stats on your bitrate, allowing you to identify fluctuations during your stream.
Step-by-Step Guide to Fixing Bitrate on Twitch
Follow these steps to adjust and fix your bitrate for a smoother streaming experience:
1. Match Bitrate to Your Internet Upload Speed
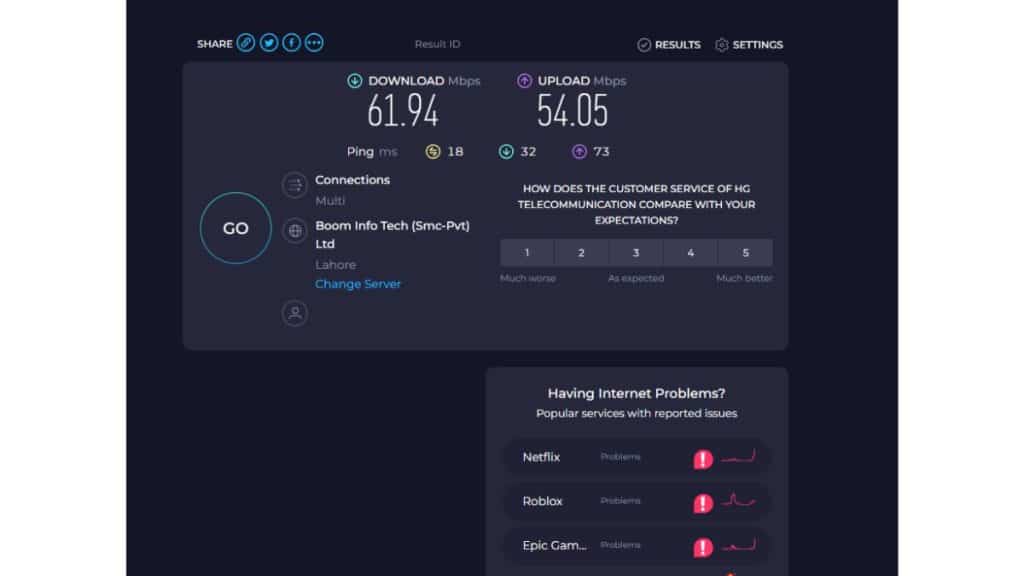
- Check your upload speed using Speedtest.net.
- Set your bitrate to 70-80% of your upload capacity to leave headroom for other online activities.
2. Adjust Bitrate in OBS or Streamlabs
- Open your streaming software (e.g., OBS, Streamlabs).
- Go to Settings > Output and locate the Bitrate field.
- Enter the recommended bitrate based on your resolution and FPS.
3. Enable Dynamic Bitrate (OBS Only)
Dynamic bitrate adjusts your bitrate automatically when your connection fluctuates, preventing lag or disconnects:
- In OBS, go to Settings > Advanced and enable Dynamically change bitrate to manage congestion.
Advanced Tips for Optimizing Bitrate
For more advanced streamers, fine-tuning encoding and other settings can enhance performance further:
1. Use Hardware Encoders
Switching to hardware encoding offloads encoding tasks from your CPU to your GPU, improving performance and reducing system strain.
- Best Options: NVIDIA GPUs support NVENC, while AMD GPUs have their own hardware encoders.
- Why It Matters: Hardware encoding delivers smoother performance and higher-quality streams, especially for games or resource-heavy applications.
2. Set Keyframe Intervals
Keyframe intervals determine how often a full frame is sent to Twitch servers.
- Recommended Setting: Set your keyframe interval to 2 seconds for better compatibility with Twitch.
- Why It Matters: A consistent interval ensures smoother playback for viewers and reduces buffering risks.
3. Adjust Buffer Size
Buffer size regulates how much data your stream holds before sending it to Twitch servers.
- Recommended Setting: Match your buffer size to your bitrate for stable performance.
- Why It Matters: Prevents data spikes that could overload your connection or cause stream instability.
4. Choose the Right Encoding Preset
Streaming software like OBS offers different encoding presets that balance quality and performance.
- Recommended Presets: Use “Quality” or “Performance” for NVENC, depending on your system’s capabilities.
- Why It Matters: A higher preset (e.g., “Max Quality”) can increase quality but may require more system resources.
5. Enable Dynamic Bitrate (OBS Only)
Dynamic bitrate adjusts your bitrate in real-time to match your connection stability.
- How to Enable: Go to Settings > Advanced in OBS and enable Dynamically change bitrate to manage congestion.
- Why It Matters: This prevents disconnects during network fluctuations and maintains stream stability.
Troubleshooting Bitrate Issues
If you’re still facing bitrate problems, here are some additional solutions:
1. Restart Your Network Devices
Restarting your router or modem is a quick way to resolve network congestion and improve connection stability. To do this, turn off your router or modem, wait for 30 seconds, and then turn it back on.
2. Reduce Network Activity
Streaming on Twitch competes with other devices on your network for bandwidth.
To reduce interference, pause large downloads, uploads, or streaming services like Netflix or YouTube during your broadcast.
This ensures your stream gets priority bandwidth, reducing bitrate drops and preventing buffering for a smoother viewer experience.
3. Upgrade Your Internet Plan
If your upload speed consistently falls below the required level for your chosen bitrate, upgrading your internet plan may be necessary. Look for a plan with at least 10 Mbps upload speed to comfortably stream at 1080p resolution.
4. Adjust Your Bitrate to Match Upload Speed
Streaming at a bitrate higher than your upload speed can cause instability and frequent buffering.
Use a tool like Speedtest.net to measure your upload speed, then set your bitrate to 70-80% of that speed in your streaming software.
This adjustment keeps your bitrate within your connection’s capacity, ensuring a stable and reliable stream for your audience.