GIFs are a popular format for creating engaging, animated content, and Canva provides powerful tools to design and export them. However, a common question is whether you can loop Canva designs when exporting them as GIFs. The answer is both yes and no, depending on the settings and tools used. Here’s everything you need to know about looping GIFs in Canva.
Understanding GIF Exporting in Canva
When you create and animate a design in Canva, you can export it as a GIF. By default, most GIFs exported from Canva loop continuously. This means that the animation will repeat automatically in most scenarios, such as in web browsers or GIF viewers.
However, Canva does not currently provide an explicit option to customize the looping behavior directly within the platform. If you need to fine-tune the loop settings, third-party tools may be required.
Steps to Loop Canva Designs in GIF Format
Follow these steps to create a looping GIF using Canva:
-
Create and Animate Your Design
- Open Canva and start a new project or edit an existing one.
- Add text, images, or other elements and apply animations. Use the Animate button in the toolbar to choose effects like fade, slide, or pop.
-
Set the Timeline for Animations
- Adjust the duration of each animation by selecting an element and modifying the timing settings.
- Use Canva’s timeline editor to preview how the animations flow together.
-
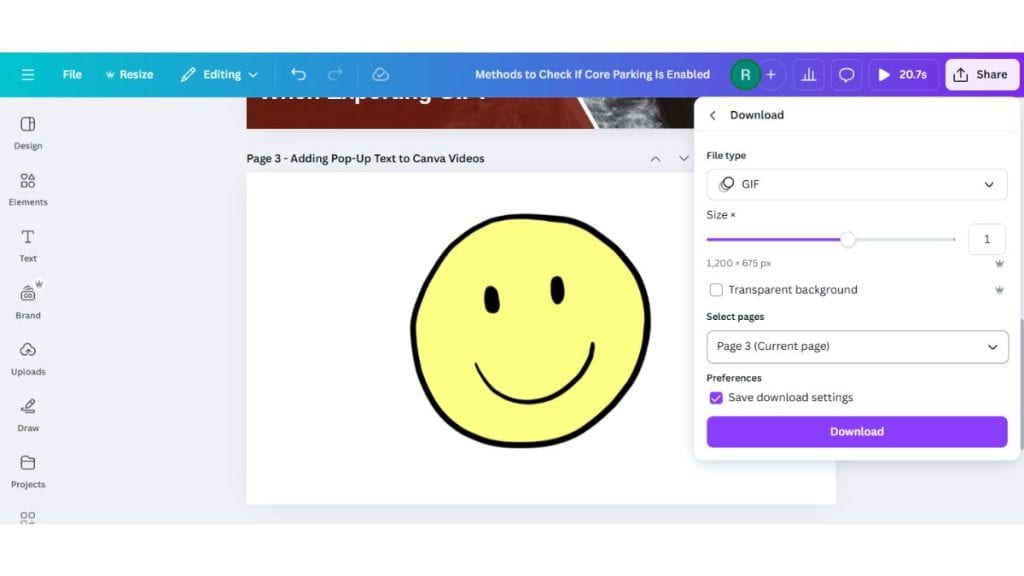
Export as a GIF
- Click on the Share button in the top-right corner.
- Select Download and choose GIF as the file format.
- Ensure the animation settings are correct and click Download.
-
Test the GIF
- Open the exported GIF in a browser or viewer to confirm it loops continuously.
Customizing Looping Settings
If you want more control over the looping behavior, Canva itself doesn’t provide advanced options. Instead, you can use these methods to customize your GIF loop:
- Adjust Animation Durations in Canva: Modify the animation timing to control how long the GIF plays before restarting.
- Use Third-Party Tools
- After exporting the GIF, upload it to a tool like EZGIF or Giphy to edit the loop settings.
- Set the loop count to infinite or a specific number based on your preference.
- Save and Test: Export the modified GIF and test it on different platforms to ensure it loops as intended.
Troubleshooting Canva GIF Looping Issues
If your Canva-exported GIF doesn’t loop as expected, here are some tips:
- GIF Viewer Limitations: Some platforms, like PowerPoint or email clients, may not support looping GIFs. Test your file in a web browser for confirmation.
- File Corruption: Re-export the GIF from Canva if the animation appears broken.
- Use a Third-Party Editor: Tools like Photoshop or EZGIF can help fix playback issues or enforce looping settings.
Using Third-Party Tools to Loop Canva GIFs
For advanced looping options, you can rely on these tools:
EZGIF
EZGIF is a free and user-friendly tool designed for editing and customizing GIFs. To use it:
- Start by uploading your Canva-exported GIF to the EZGIF platform using the Upload button.
- Navigate to the looping settings, where you can specify the number of repetitions or select the option for an infinite loop.
- Once adjusted, download the updated GIF file and use it across your platforms.
EZGIF is ideal for quick edits and works seamlessly with Canva-created GIFs.
Giphy
Giphy, a widely-used platform for creating and sharing GIFs, offers easy-to-use tools for customizing loop settings.
- Upload your Canva GIF to Giphy’s editor.
- Use the available settings to apply a looping effect, either as an infinite loop or for a specific duration.
- Save and share your GIF directly from Giphy, or download it for use elsewhere.
This tool is perfect for creating GIFs intended for social media or online platforms, as it also enhances discoverability through Giphy’s network.
Photoshop
For those looking for professional-grade editing capabilities, Photoshop provides robust tools to control GIF behavior:
- Import your Canva-exported GIF into Photoshop by opening it as a sequence of frames.
- Access the timeline settings to modify frame properties and set the desired loop count, including infinite looping.
- Export the GIF with the new settings, ensuring that the adjustments are reflected.
Photoshop is excellent for advanced users who need detailed control over their GIF animations and output quality.
These tools complement Canva’s capabilities and allow for more precise control over GIF behavior.
Conclusion
While Canva’s default GIF export loops continuously in most cases, it doesn’t allow explicit control over loop settings. For users who need advanced options, third-party tools provide a solution.
Whether you’re designing for social media, websites, or presentations, looping GIFs created in Canva can add a dynamic touch to your projects. Experiment with the tools and methods outlined above, and share your experience in the comments. If this guide helped you, don’t forget to share it with others looking to master Canva’s GIF capabilities!
Published on January 22, 2025 under .