Customizing the color of a scale bar in ArcGIS Pro is a simple yet impactful way to enhance the visual appeal and readability of your map. Whether you need to match your scale bar to a theme or improve its contrast against the background, this guide provides clear instructions to help you make these changes efficiently.
Why Customize the Scale Bar Color in ArcGIS Pro Layout?
The scale bar is a vital component of any map, providing a visual reference for distance. Customizing its color can:
- Improve Visibility: Make the scale bar more legible against your map’s background.
- Enhance Aesthetics: Match the color scheme of your map for a professional finish.
- Focus Attention: Highlight important design elements by creating contrast.
- Align with Branding: Use colors that match organizational or project-specific branding for consistency.
Steps to Change the Scale Bar Color in ArcGIS Pro
Follow these step-by-step instructions to change the color of a scale bar in your ArcGIS Pro layout:
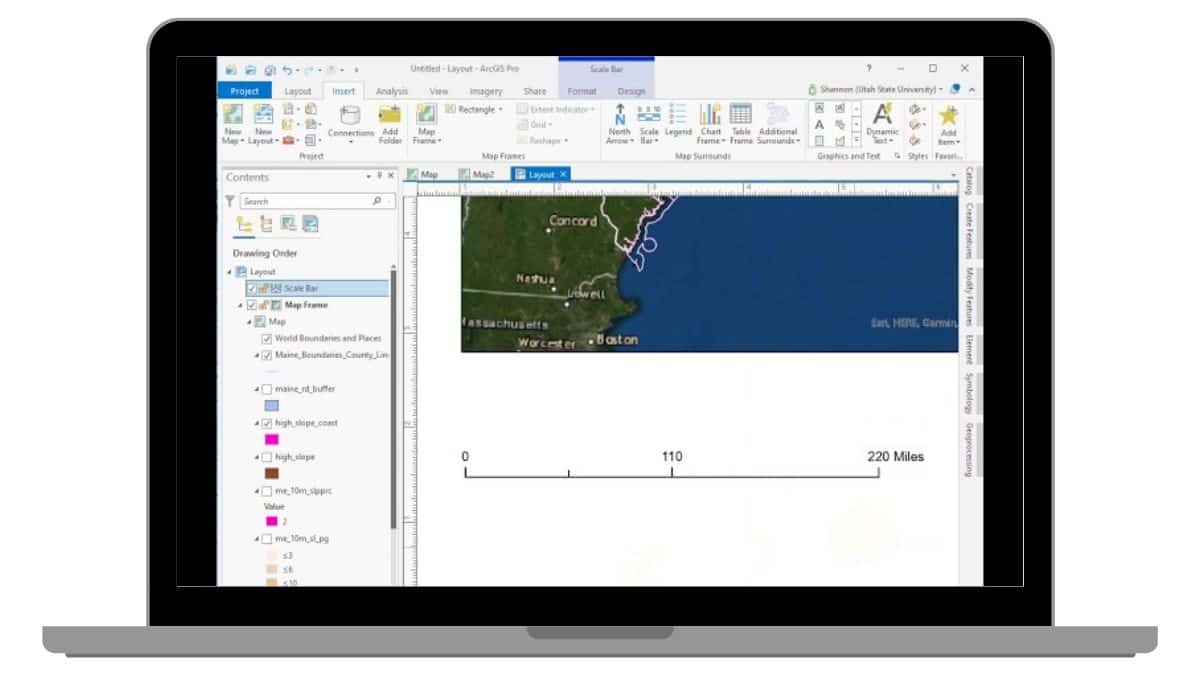
- Select the Scale Bar
- In the Contents pane, locate and click the scale bar within your layout. This will highlight it in the layout view.
- Access the “Scale Bar” Tab
- On the ribbon, navigate to the Scale Bar tab, which appears when the scale bar is selected.
- Modify the Scale Bar Color
- Under the Symbol section, click the color swatch to open the color picker. Choose a new color or create a custom one to apply to the scale bar.
- Change Text Label Colors
- To adjust the color of text labels on the scale bar, go to the Text Symbol section. Click the color dropdown and select the desired text color.
- Access the Element Pane for Detailed Adjustments
- For finer control, right-click the scale bar and choose Properties to open the Element Pane. Here, you can modify individual components like ticks, labels, and scale bar divisions.
- Apply and Save Changes
- Once satisfied with the adjustments, click Apply and save your layout to preserve the changes.
Common Issues and Troubleshooting Tips
Even though the process is straightforward, you might encounter some challenges. Here are common issues and their solutions:
- Scale Bar Color Doesn’t Update: Click Apply after selecting a new color to ensure the changes take effect.
- Missing Color Customization Options: Use the Insert > Scale Bar menu to replace the current scale bar with one that supports color customization.
- Text Labels Not Changing Color: Select the Text Symbol option under the Scale Bar tab to modify the label colors.
- Changes Not Saved: Save your project immediately after making adjustments to avoid losing updates.
Advanced Customization Tips
For a more polished design, consider these advanced options:
- Gradient Colors: Apply gradient effects to create a dynamic and modern look.
- Transparency Settings: Adjust transparency to blend the scale bar into the map without losing readability.
- Custom Tick Marks and Divisions: Use the Element Pane to fine-tune tick mark spacing, thickness, and style.
Conclusion
Changing the color of a scale bar in ArcGIS Pro is an easy way to improve the visual impact of your map while maintaining its functionality. By following the steps outlined in this guide, you can quickly customize the scale bar to align with your design goals. If you encounter any challenges, refer to the troubleshooting tips to resolve them efficiently.
Did this guide help you customize your scale bar? Share your thoughts or ask questions in the comments below! Don’t forget to share this article with your colleagues to help them create stunning maps in ArcGIS Pro.