Phasmophobia, a popular ghost-hunting game, allows players to customize controls to improve gameplay and comfort. The scroll keybind, often used to switch items or navigate menus, is a crucial part of the control system. Whether you’re looking to adjust it for convenience or accessibility, this guide will show you how to change the scroll keybind in Phasmophobia and optimize your gaming experience.
Understanding Keybinds in Phasmophobia
Keybinds in Phasmophobia are customizable controls that let players interact with the game world. The scroll keybind, typically linked to the mouse wheel, is used for switching between inventory items or actions.
Customizing keybinds helps players tailor the controls to their preferences, ensuring a smoother and more enjoyable gameplay experience.
Why Change the Scroll Keybind?
There are several reasons why you might want to change the scroll keybind in Phasmophobia:
- Comfort: Some players find the default mouse wheel action uncomfortable or inconvenient during intense gameplay.
- Hardware Preferences: Gamers with specialized mice or keyboards may want to map the scroll function to a different button for better control.
- Accessibility: Adjusting keybinds can make the game more accessible for players with specific needs or physical limitations.
- Improved Gameplay: Customizing the scroll key can make actions faster and more intuitive, especially during high-pressure situations.
How to Access Keybinding Settings in Phasmophobia
To change the scroll keybind, you first need to navigate to the keybinding menu. Follow these steps:
- Launch Phasmophobia:
- Open the game and wait for the main menu to load.
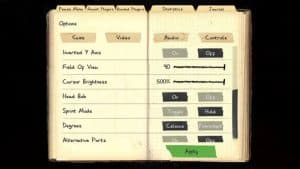
- Go to Settings:
- Click on the Options button from the main menu.
- Select the Controls Tab:
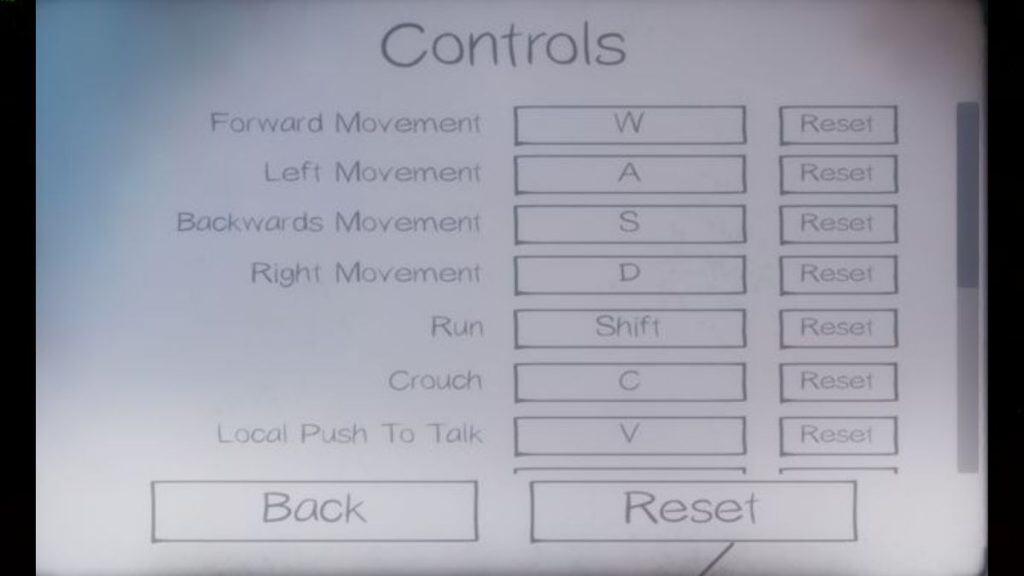
- In the settings menu, navigate to the Controls or Keybinds tab. This is where all customizable inputs are located.
This menu gives you full control over your keybinds, including the scroll function.
Steps to Change the Scroll Keybind
Once you’re in the keybinding menu, follow these steps to adjust the scroll key:
- Locate the Scroll Function:
- Look for the action assigned to the scroll key, such as “Switch Items” or “Next/Previous Item.”
- Click on the Current Keybind:
- Select the key or button currently assigned to the scroll function. It should highlight or prompt for a new input.
- Assign a New Key:
- Press the desired key or button to set it as the new scroll action. This could be a mouse button, keyboard key, or another input device.
- Save Changes:
- Confirm the changes and exit the settings menu. Test the new keybind in a game to ensure it works as expected.
Using Third-Party Tools for Advanced Keybinding
For more complex keybinding needs, third-party tools like AutoHotkey or proprietary software for gaming mice (e.g., Logitech G Hub, Razer Synapse) can provide additional customization options:
- Remap Scroll to Other Buttons: Use these tools to assign the scroll function to programmable mouse buttons.
- Create Macros: Set up macros for multitasking, combining actions into a single input.
Ensure that any third-party software you use is safe and compatible with the game.
How Can You Solve Common Keybinding Problems?
If you encounter problems while changing the scroll keybind, here are some common issues and solutions:
- Keybind Not Saving: Ensure you’ve clicked “Apply” or “Save” in the settings menu before exiting.
- Conflicting Keybinds: Check if the new keybind conflicts with another action. Adjust other bindings as needed.
- Scroll Not Responding: Update your input device drivers or restart the game to resolve potential compatibility issues.
- Reverting to Default: If keybinds reset, check for game updates or verify the game files in Steam to fix possible glitches.
Best Practices for Customizing Keybinds
To optimize your gameplay, consider these tips when customizing keybinds:
- Use Ergonomic Positions: Assign keys that are easy to reach and minimize strain during extended play sessions.
- Group Similar Actions: Map related actions to keys that are close together for quick access.
- Test in Training Mode: Use the game’s training mode to experiment with different setups and find what works best for you.
- Backup Your Configuration: Note your preferred settings in case you need to reconfigure them after updates.
How Do You Reset All Keybind Settings in Phasmophobia?
If your custom keybinds aren’t working or you want to start fresh, you can restore the default settings:
- Go to the Keybinding Menu:
- Access the settings as described earlier.
- Click Restore Defaults:
- Look for the Restore Defaults button and select it to reset all keybinds.
- Save Changes:
- Confirm the reset and exit the menu.
This will return all controls to their original configuration.
Conclusion
Customizing the scroll keybind in Phasmophobia is a simple yet effective way to improve gameplay comfort and efficiency. By following the steps outlined in this guide, you can easily change the scroll key to suit your preferences. Don’t forget to experiment with different setups and use the troubleshooting tips if you encounter any issues.
If you’ve found this guide helpful or have other tips for customizing Phasmophobia controls, share them in the comments below! Feel free to pass this article along to fellow ghost hunters looking to optimize their game.
Published on January 21, 2025 under .