Have you ever hesitated and put off changing the theme of your website because you are unsure of the results? How many times have you checked out a plugin and decided not to go for it because you are afraid your site might go down because of plugin incompatibility?
But before we start, you must be clear about why you even want to create a staging area for your WordPress site. Whenever you make a change to a page, you can save it in draft mode, or you can publish the changes live. At this point, how sure are you that the changes you are about to take live will not cause the page (or the entire website) to crash.
There is really no way of being sure about it.
This is where you can see the full potential of a staging environment where you can test plugins and theme updates without breaking the live site. A staging environment is a separate and isolated location on your WordPress websites that you can test and evaluate website changes.
How Can You Build WordPress Staging Sites on Cloudways?
Cloudways is a great managed platform for WordPress websites of all descriptions. Whether you are a simple WordPress blog, WooCommerce multi-vendor store, a service provider or agency, Cloudways provides all the features you need for a hassle-free managed hosting experience.
Cloudways offers a simple process for creating staging areas on the same server that hosts your WordPress website. Check out the following steps to see the easy process of launching a staging area for your website.
-
Step 1: Log into Cloudways Platform
-
Step 2: Create the Staging Application
-
Step 3: Choose a Server for Staging Application
-
Step 4: Copy Data from Staging to Live
-
Step 5: Backup Before Pushing Changes to Live Application
-
Step 6: Rollback button at the Live Application
Step 1: Log into the Cloudways Platform
- First of all, if you are not familiar with Cloudways fully managed WordPress hosting, I would suggest you sign up for a free trial and check out great managed hosting experience.
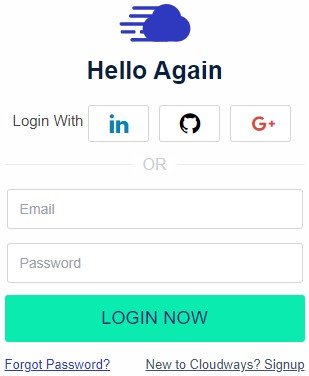
- If you already have a Cloudways account, go to the login screen and enter your credentials.
Step 2: Create the Staging Application
- Go to the Applications tab
- Select the application for which you wish to create the staging environment
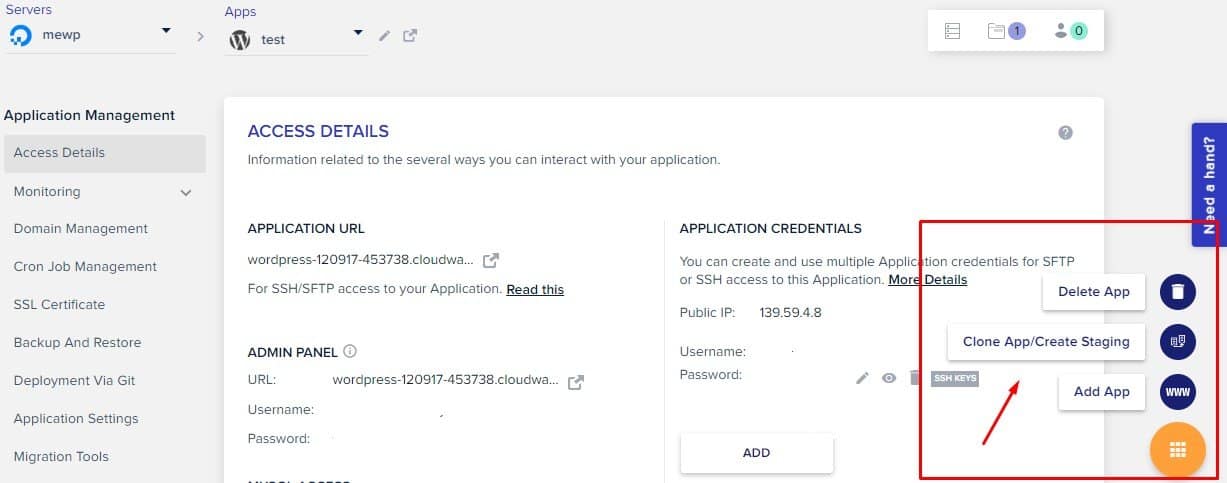
- Next, select the Clone App/Create Staging option

You can also select the Clone App/Create Staging option under the Application Management tab. Click the circular grid icon and select “Clone App/Create Staging” to set up the Staging environment.
Step 3: Choose a Server for Staging Application
- Once you have selected the Clone App/Create Staging option, you will be prompted for server selection.
- Here you need to select your server. If you wish, you can also choose to host the staging environment on a new server.
- After selecting the server, make sure to check the Create As Staging option
- Next, click the Continue button
- Creating the staging application usually takes a few minutes

Once the staging application is live, you can see the Staging tag beside the application’s name in the Applications tab.
Step 4: Copy Data from Staging to Live
- After completing the process, the new staging application is ready for use
- Go to the staging application
- Under the Application Management side menu, you can see the Staging Management
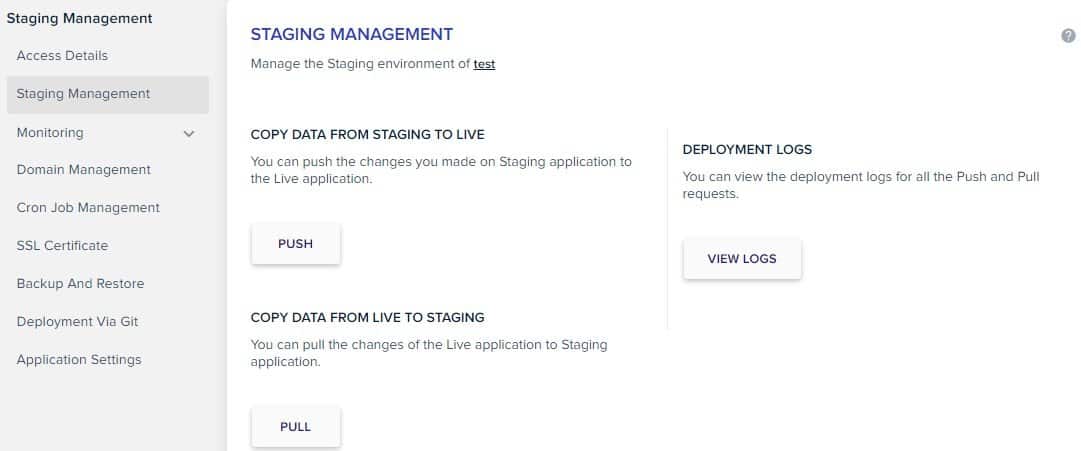
You can see three options here:
- Push: You can push the changes you made on the Staging application to the Live application.
- Pull: You can pull the contents of the Live application to the Staging application.
- Logs: You can view the deployment logs for all the Push and Pull requests.
Step 5: Backup Before Pushing Changes to Live Application
You can also back up the live version before pushing changes from the staging version. This is an important precaution that ensures that you can recover in case the live site breaks.

P.S: Here is a must-read guide with important notes on the Cloudways Staging environment.
Step 6: Rollback Button at the Live Application
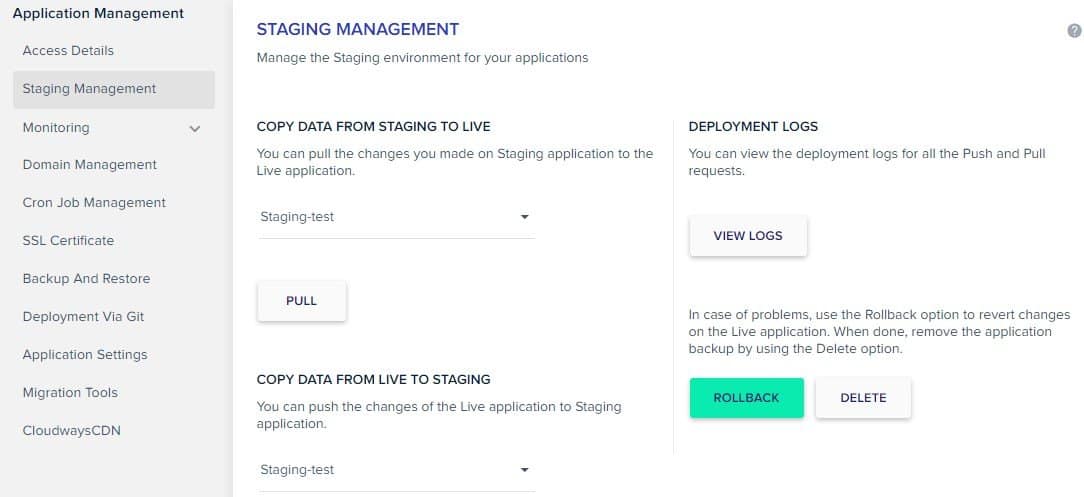
If you have pushed changes from the Staging to the Live application, you will see a Rollback button at the Live Application. This button only works if a backup of the Live application was taken before the Push operation.
You also have a delete option in case if you want to delete the backup of the Live application.
Final Thoughts!
That’s it! I hope now you can easily create a WordPress staging site without any hassle and save yourself a lot of headaches. If you have any questions and queries, feel free to ask in the comment section below.
Thanks for reading this article. 🙂
Published on December 2, 2019 under Cloudways, staging site, wordpress.